In a recent project the RedBit team worked on, we decided to use Xamarin.Form to build an app for Windows Phone, iOS and Android. Xamarin Forms is still a v1 product but the Xamarin team is rapidly releasing updates to fill in some gaps. As a developer you still have the opportunity to extend Xamarin Forms, for example by building custom renderers. We’ll have a series of blog posts on some learnings from the team to help extend Xamarin.Forms and meet our client’s requirements.
In this first post, we’ll be looking at how to easily implement GZip Compression for HttpClient on iOS, Android and Windows. We will be leveraging this Gist from @dotMorten to implement GZip for Windows Phone. This works great, but unfortunately is outdated since we can now use the Microsoft.BCL.Compression library. The second unfortunate part is this does not work on iOS and Android using Xamarin.
Why implement GZip?
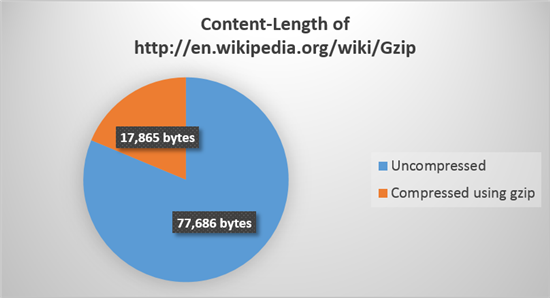
On mobile, you want things to be as fast as possible and this includes data being transmitted. Compressed data is faster to transmit than non-compressed data, but remember, there may be a slight performance hit de-compressing the data on the client side. Here is chart comparing compressed and uncompressed data taken from Portable Compression Blog from Microsoft
The next few steps go over this adding GZip support for a shared project for iOS, Android and Windows Phone using Xamarin.
Support for Windows Phone
With the release of Microsoft.BCL.Compression, which exposes the System.IO.Compression namespace, the team decided to extend the original Gist in combination with Microsoft.BCL.Compression package. This was a fairly straight forward change and the following will list the steps. If you want to follow along you can download the code from GitHub tagged ‘StartHere’
First, open up the project and add a package reference to Microsoft.BCL.Compression using NuGet Package Manager
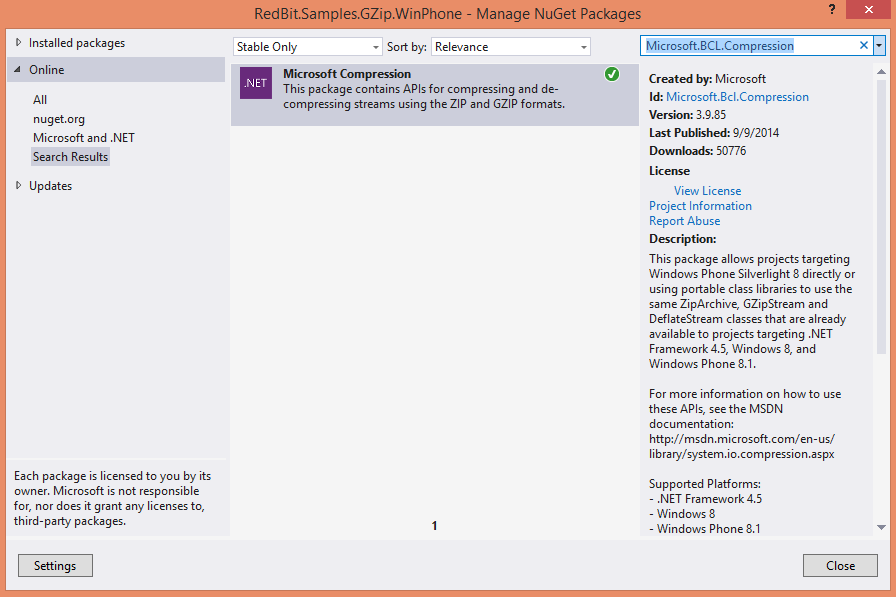
Download the HttpGZipClientHandler.cs from GitHub and add to your project. Your shared project should look like the following

Updating the HttpGZipClientHandler
Open HttpGZipClientHandler.cs and change the implementation of HttpGzipContent to the following
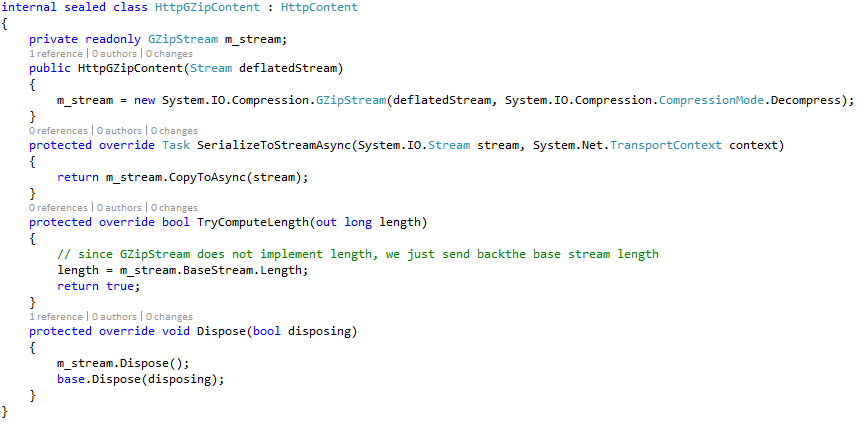
Notice here we change the constructor to use the System.IO.Compression and the TryComputeLength() method to use the BaseStream.Length property instead since GZipStream.Length is not implemented. Everything else stays the same.
Updating MainPage.cs
Now that we have our HttpGZipClientHandler class ready we can update MainPage.cs.
First thing we need to do is add a member variable bool _useGzip;
Next, we need add some code to initialize a Switch to be able to enable or disable gzip for the request. Add the following to the top of the constructor of MainPage
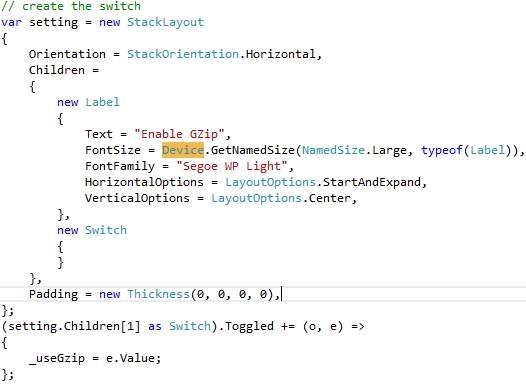
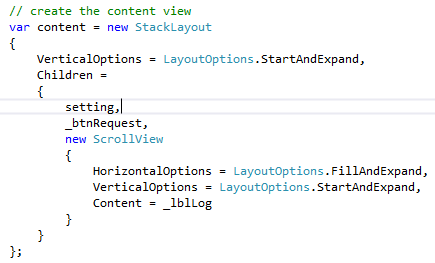
Add the setting variable just created to the Children property of the StackLayout (approximately line 64). Your code should look like the following
Run the project on Windows Phone and your page should look like the following
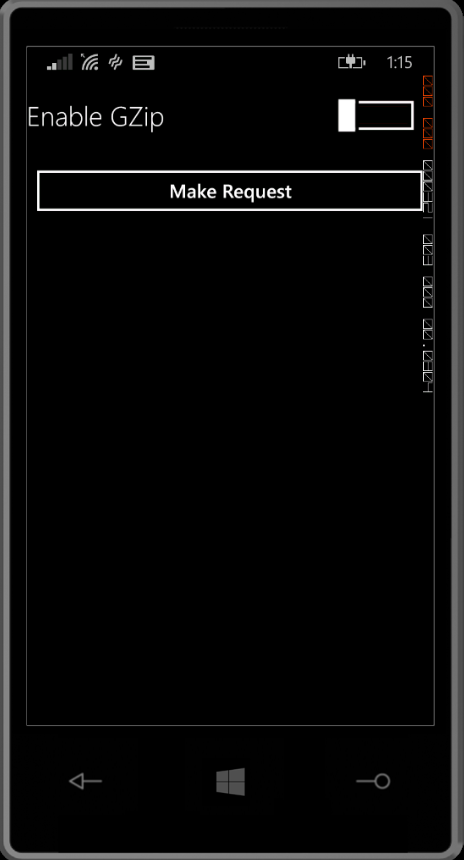
Enabling GZip with HttpClient
Now that the UI is ready and the HttpGZipClientHandler is ready, we can enable it when making the request. Change the implementation of CreateHttpClient to the following

Change the _url variable to Gzip(http://en.wikipedia.org/wiki/Gzip), deploy the app to Windows Phone and make a request with and without gzip enabled. Your output should look like the following
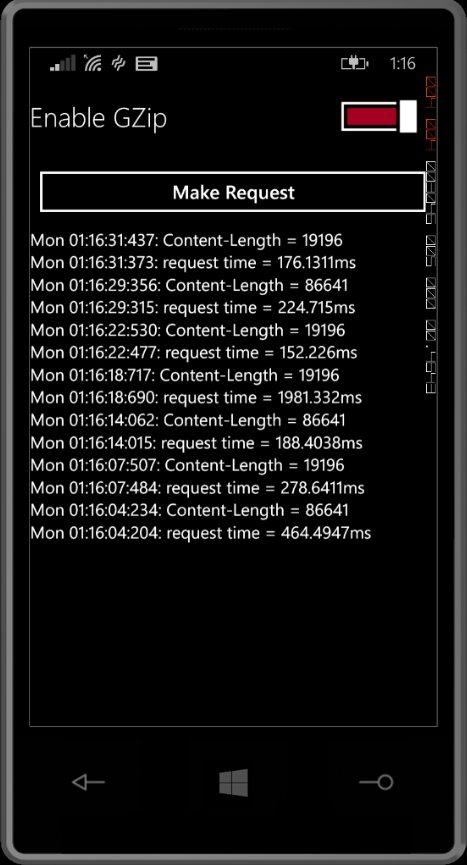
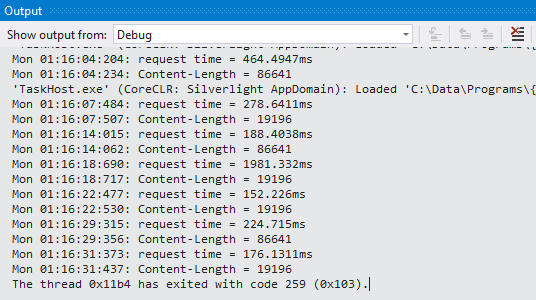
Take a look at the debug console and you will see the following that shows the size of the data returned and the size of the uncompressed data.
Support for iOS
One of the great advantages of Xamarin, is the ability to take your existing code, and with minimal changes, sometimes even no changes, you can have the same app working on iOS and Android and not just Windows. If you are following along, you can use the ‘start-ios’ tag as a starting point.
To enable support for iOS do the following
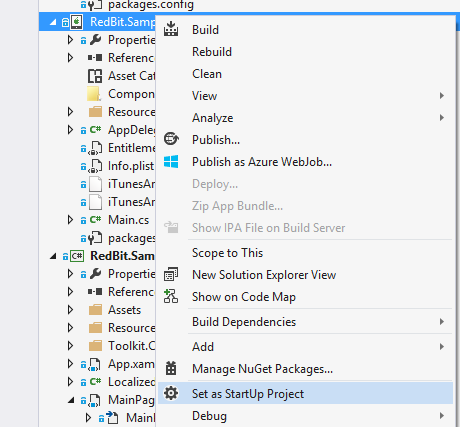

- Build the app to see the errors; 8 in total, and they should look like the following

- To fix the errors right click on the iOS References and clicking Add Reference

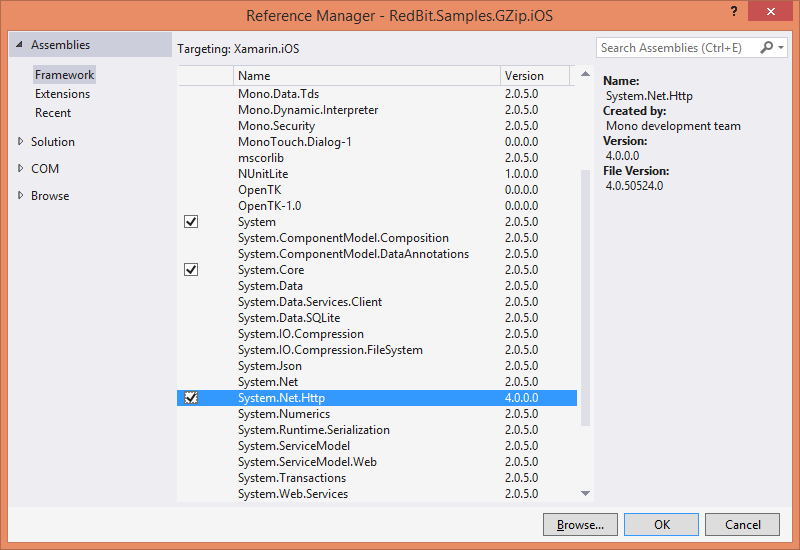
- In the Reference Manager dialog, add a reference to System.Net.Http
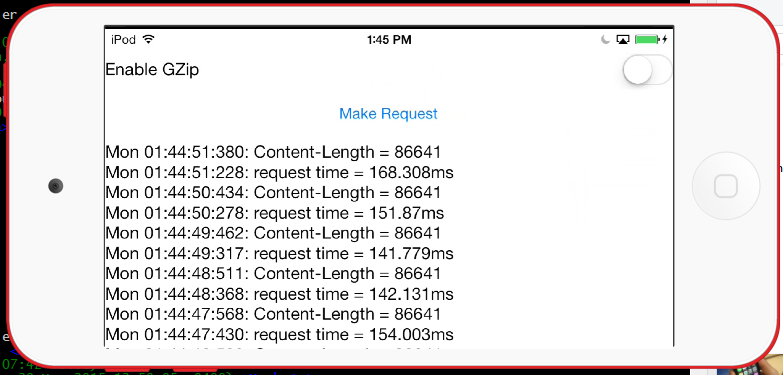
Attempt to debug and run the project and you will get the following output

A couple of things to note here
- The switch is not really accessible but this is easily fixable
- Content-Length is always 86641 whether GZip is enabled or not
Fixing the Switch on iOS
Since Xamarin.Forms wraps native controls there are sometimes nuances between platforms and having the switch under the titlebar on iOS is one of those. To fix this, we simply add a padding to the setting variable we created earlier with the following code change

Your app should look like the following now
Showing the Right Content-Length
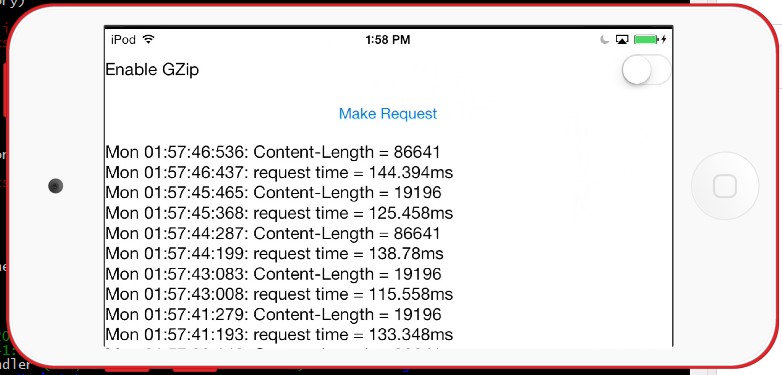
The next thing you will notice is showing the right Content-Length. For Windows Phone this just works, but for iOS (and Android) since we are using Mono’s implementation of System.IO.Compression and System.Net.Http.HttpClient, the implementation is slightly different.
To fix this, we can again take advantage of Device.OnPlatform like we did for the setting variable to fix the switch not accessible on iOS. Open HttpGZipClientHandler and in the constructor of HttpGZipContent add the following line to the end

With the code implemented you should now get the correct output for Content-Length
Support for Android
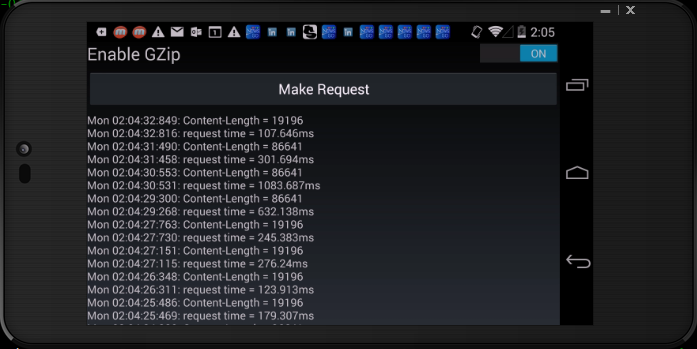
To support Android, the only thing we have to do is add reference to System.Net.Http similar to how we did for iOS. Assuming you successfully have done that here is what the output should look like (this is running on a Google Nexus 4). If you are having troubles you can get the final solution here.
Wrap Up
So in this article, we went through and updated some old code for Windows Phone to update using Microsoft.BCL.Compression package now available and to use the same code across iOS and Android with almost no changes. This is what makes Xamarin very powerful and why we use it for customer projects, because of the time saved to support new platforms while still getting the benefits of native code.
As always, all the code is available on GitHub at RedBit.Samples.Gzip and feel free to leave your comments or questions here or on GitHub.


